
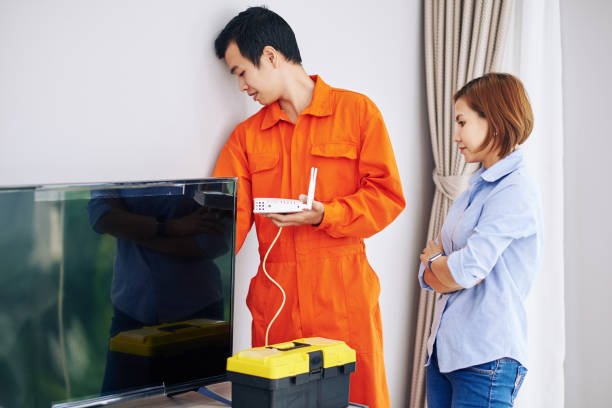
Introduction
A reliable home network is essential for modern living. Whether you’re working remotely, attending online classes, streaming 4K videos, gaming, or managing smart home devices, even a minor network problem can disrupt your daily routine. Fortunately, you don’t need to be an IT expert to diagnose and fix most home network issues.
This FixOps guide walks you through a professional troubleshooting process, helping you identify the root cause of network problems and apply effective solutions.
Understanding Your Home Network
Before troubleshooting, it’s helpful to know the main components of a typical home network:
- Internet Service Provider (ISP): Delivers internet access to your home.
- Modem: Connects your home to the ISP’s network.
- Router: Distributes the internet connection to wired and wireless devices.
- Wi-Fi Access Point: Built into most modern routers, providing wireless connectivity.
- Connected Devices: Computers, smartphones, tablets, smart TVs, gaming consoles, and IoT devices.
If any part of this chain fails, your network performance can suffer.
Common Signs of Home Network Problems
Watch for these symptoms:
- Slow internet speeds
- Frequent Wi-Fi disconnections
- Devices unable to connect
- High latency during gaming
- Video buffering
- Websites failing to load
- Weak Wi-Fi signal in certain rooms
- Smart home devices going offline
Recognizing these signs helps narrow down the cause more quickly.
Step 1: Determine the Scope of the Problem
Ask yourself:
- Is only one device affected?
- Are all devices experiencing issues?
- Is the problem limited to Wi-Fi?
- Does the wired connection also fail?
Interpretation
| Situation | Likely Cause |
|---|---|
| One device affected | Device-specific issue |
| All devices affected | Router, modem, or ISP problem |
| Wi-Fi only | Wireless interference or router issue |
| Wired and wireless affected | Modem, ISP, or router failure |
Step 2: Check for ISP Outages
Before making changes to your network:
- Visit your ISP’s outage page.
- Check local outage reports.
- Contact customer support if needed.
If there’s an outage, local troubleshooting won’t restore service until it’s resolved.
Step 3: Inspect Your Hardware
Check the following:
Modem
- Power light is on.
- Internet/WAN light is active.
- No warning indicators.
Router
- Power light is stable.
- Wi-Fi indicator is on.
- Ethernet ports show activity if devices are connected.
Cables
Inspect:
- Ethernet cables
- Fiber cables
- DSL lines
- Power adapters
Replace any damaged cables.
Step 4: Restart Your Network Equipment
Follow this order:
- Turn off the modem.
- Turn off the router.
- Wait 60 seconds.
- Turn on the modem.
- Wait until all status lights stabilize.
- Turn on the router.
- Reconnect your devices.
This process refreshes network connections and clears temporary issues.
Step 5: Test Internet Speed
Run a speed test to measure:
- Download speed
- Upload speed
- Ping (Latency)
Compare the results with your subscribed internet plan.
If speeds are consistently much lower than expected, continue troubleshooting or contact your ISP.
Step 6: Test Wired vs. Wireless Connections
Connect a computer directly to the router using an Ethernet cable.
Results
Ethernet works well, Wi-Fi is slow
Possible causes:
- Wi-Fi interference
- Poor router placement
- Weak signal
Both Ethernet and Wi-Fi are slow
Possible causes:
- ISP issues
- Modem failure
- Router hardware problems
Step 7: Optimize Router Placement
A poorly placed router can reduce both speed and coverage.
Best Practices
- Place the router near the center of your home.
- Keep it elevated.
- Avoid metal cabinets.
- Stay away from microwaves and cordless phones.
- Keep it clear of thick concrete walls.
Proper placement improves signal strength throughout your home.
Step 8: Check for Wi-Fi Interference
Common interference sources include:
- Neighboring Wi-Fi networks
- Bluetooth devices
- Baby monitors
- Microwave ovens
- Wireless security cameras
Switching to a less congested Wi-Fi channel or using the 5 GHz band can improve performance.
Step 9: Update Router Firmware
Manufacturers release firmware updates to:
- Improve performance
- Fix bugs
- Enhance security
- Increase compatibility
Log in to your router’s administration panel and install any available updates.
Step 10: Update Device Drivers
Outdated network drivers may cause:
- Connection failures
- Slow speeds
- Random disconnections
Update:
- Wi-Fi adapter drivers
- Ethernet adapter drivers
- Operating system updates
Restart your device after installing updates.
Step 11: Check Network Security
Unauthorized users can consume bandwidth and slow your network.
Security Tips
- Use WPA2 or WPA3 encryption.
- Choose a strong Wi-Fi password.
- Disable WPS if you don’t use it.
- Review the list of connected devices regularly.
- Remove unknown devices.
Step 12: Manage Connected Devices
Too many active devices can overload your network.
Examples include:
- Smart TVs
- Streaming devices
- Gaming consoles
- Smartphones
- Security cameras
- Smart speakers
Disconnect devices that aren’t in use and schedule large downloads during off-peak hours.
Step 13: Configure DNS Settings
Slow or unreliable DNS servers can delay website loading.
Popular alternatives:
- Google Public DNS
- 8.8.8.8
- 8.8.4.4
- Cloudflare DNS
- 1.1.1.1
- 1.0.0.1
Changing DNS can improve browsing responsiveness, though it won’t increase your internet bandwidth.
Step 14: Scan for Malware
Malware can consume bandwidth and affect network performance.
Run a full system scan using reputable antivirus software and remove any detected threats.
Step 15: Reset Your Router (Last Resort)
If you’ve exhausted all other options:
- Press and hold the Reset button for 10–15 seconds.
- Wait for the router to restart.
- Reconfigure your Wi-Fi network.
- Reconnect your devices.
Note: A factory reset erases all custom settings, including Wi-Fi names and passwords.
Professional Network Troubleshooting Checklist
Use this checklist before contacting technical support:
- Check for ISP outages.
- Restart the modem and router.
- Test wired and wireless connections.
- Inspect cables and hardware.
- Update router firmware.
- Update network drivers.
- Optimize router placement.
- Check for interference.
- Secure your Wi-Fi network.
- Scan devices for malware.
- Reset the router if necessary.
Tips to Maintain a Healthy Home Network
- Restart your router monthly.
- Keep firmware up to date.
- Replace routers older than five years.
- Use Ethernet for bandwidth-intensive tasks.
- Position your router centrally.
- Upgrade to a mesh Wi-Fi system for large homes.
- Monitor connected devices regularly.
Frequently Asked Questions (FAQs)
Why is my home network slow even with fast internet?
Weak Wi-Fi signals, outdated equipment, too many connected devices, interference, or ISP congestion can all reduce network performance.
How often should I replace my router?
Most routers perform well for about 4–5 years. Upgrading to a newer model can improve speed, coverage, and security.
Is Ethernet better than Wi-Fi?
Yes. Ethernet generally provides faster speeds, lower latency, and a more stable connection, making it ideal for gaming, video conferencing, and large file transfers.
When should I call a professional?
If you’ve completed all troubleshooting steps and continue to experience persistent network problems, it may be time to contact your ISP or a qualified network technician.
Conclusion
Diagnosing home network problems like a professional involves a systematic approach rather than guessing. By checking your ISP status, inspecting hardware, testing connections, optimizing your Wi-Fi setup, and keeping your equipment updated, you can solve most network issues without advanced technical skills. Regular maintenance and good network practices will help keep your home internet fast, stable, and secure.